Products
Pole-mounted LED spotlight selection guide
Pole-mounted LED spotlights are a good starting point when outdoor projection needs an elevated fixture position, side aiming, or a bracketed mounting point instead of a ground base, spike, recessed fixture, or wall-mounted light. Use this category for gateways, site entrances, perimeter features, tall trees, paths, signs, facade details, and commercial landscape areas where pole height, target distance, beam direction, and viewer glare all need to be checked before the final model is confirmed.
| Project condition | Best starting path | Confirm before quotation |
|---|---|---|
| Elevated pole, arm, bracket, or site structure is already available. | Pole-mounted spotlight range. | Pole height, bracket size, aiming direction, target distance, cable route, and maintenance access. |
| Tree, sign, gateway, path edge, or facade detail needs side or downward projection. | 36W or 48W pole-mounted reference. | Target size, viewer angle, preferred beam spread, finish, mounting hardware, and fixture quantity by zone. |
| Longer throw, wider target, or higher mounting point needs stronger projection. | 120W pole-mounted projection reference or high-output projection planning. | Mounting height, setback, target width, aiming angle, glare view, and whether multiple moderate fixtures give smoother coverage. |
| The design may work better from the ground, wall, or landscape bed. | Compare ground, spike, recessed, wall, or flood-light alternatives. | Installation surface, drainage, visible housing style, wiring route, and adjustment access. |
How to choose pole height, beam direction, and aiming position
Do not choose a pole-mounted spotlight by wattage alone. Start with the geometry: pole height, target distance, target width, viewing direction, and nearby surfaces that should not receive stray light. A higher pole usually changes the useful beam spread and the glare angle seen by pedestrians, drivers, or building users. A lower pole may be easier to maintain but can create bright foreground glare if the fixture is aimed too directly toward people.
| Planning item | Why it matters | Practical check |
|---|---|---|
| Mounting height | Controls throw distance, visible source angle, and how quickly the beam spreads. | Record pole height, bracket offset, fixture tilt range, and expected maintenance method. |
| Beam preference | Narrower beams help long throw and target focus; wider beams cover larger near areas but can spill beyond the target. | Match beam choice to target width, setback, surface texture, and whether overlapping fixtures are planned. |
| Aiming direction | A small aiming change can move the bright zone, create hot spots, or send light toward roads and windows. | Mark target center, viewer positions, nearby property edges, and areas where spill light should be limited. |
| Mounting hardware | The bracket, clamp, arm, or pole adapter determines stability and adjustment range. | Share pole diameter, bracket drawing, mounting photos, wind-exposure notes, and cable exit direction. |
| Project confirmation | Colour output, control preference, finish, optics, cable, and environmental protection target can change by configuration. | Confirm the final configuration in the quotation record instead of assuming one default setup. |
Pole-mounted versus other outdoor projection paths
| Fixture path | Use when | Compare with |
|---|---|---|
| Pole-mounted LED spotlight | The project needs elevated side aiming, adjustable projection, or a pole/bracket location already exists. | 36W pole-mounted reference, 48W pole-mounted reference, and 120W pole-mounted projection reference. |
| Landscape spotlight | The fixture can sit on a base, low structure, or landscape position for medium outdoor projection. | landscape LED spotlight planning. |
| Compact flood or spot light | The target is close, smaller, or needs a compact fixture body. | outdoor projection and compact flood-light options. |
| Garden spike light | Planting beds, tree accents, and flexible ground aiming are more important than pole mounting. | LED garden spike lights. |
| Recessed in-ground light | The design needs a clean ground-level fixture appearance and upward projection. | LED in-ground lights. |
Buyer checklist before selecting a pole-mounted spotlight
- Send pole height, pole diameter or bracket drawing, target distance, target width, and photos of the mounting position.
- Mark viewer locations, roads, windows, paths, neighboring areas, and any glare-sensitive direction.
- Confirm whether the lighting effect is accent, path guidance, sign lighting, tree lighting, facade detail, or perimeter projection.
- Confirm preferred housing finish, cable route, mounting hardware, colour output, control preference, and environmental protection target.
- Ask for the final datasheet, drawing, optical option, mounting note, and quotation record for the confirmed configuration.
Common pole-mounted spotlight selection mistakes
| Mistake | Result | Better approach |
|---|---|---|
| Choosing only by wattage. | The page may look bright on paper but fail on target coverage, glare, or uniformity. | Compare mounting height, target distance, beam preference, aiming angle, and fixture quantity together. |
| Ignoring bracket and pole details. | The selected fixture may not fit the pole, may aim poorly, or may be difficult to service. | Confirm pole diameter, arm position, adapter requirement, cable path, and adjustment range early. |
| Using one wide beam to cover every area. | Light can spill beyond the target and reduce visual comfort. | Use beam planning by zone, and consider multiple fixtures or narrower aiming where control matters. |
| Leaving project inputs until the final quotation. | The confirmed model may need late revisions. | Prepare drawings, photos, target dimensions, finish preference, and configuration notes before the quotation discussion. |
Which pole-mounted LED spotlight should I start with?
Start with the 36W or 48W pole-mounted references for smaller targets, side-mounted landscape accents, paths, signs, and medium-distance features. Use the 120W pole-mounted projection reference when the mounting position is higher, the target is larger, or the project needs stronger outdoor projection. The final choice should still be confirmed by pole height, target distance, beam preference, finish, cable route, and mounting hardware.
When is a pole-mounted spotlight better than a ground spotlight?
A pole-mounted spotlight is better when the project needs elevated aiming, a cleaner ground area, easier side projection, or a bracketed location that already exists. A ground or spike fixture is usually simpler when the target is close and the fixture can be adjusted from the landscape bed.
What information helps confirm the correct pole-mounted fixture?
Useful inputs include pole height, pole diameter, bracket drawing, target width, target distance, viewing direction, cable route, desired lighting effect, finish preference, and whether the project needs a project-specific colour or control setup.
Can one pole-mounted spotlight cover a whole outdoor area?
Sometimes one fixture is enough for a small target, but larger areas often need multiple aiming points. Compare target size, setback, beam preference, overlap, glare direction, and maintenance access before deciding fixture quantity.
-
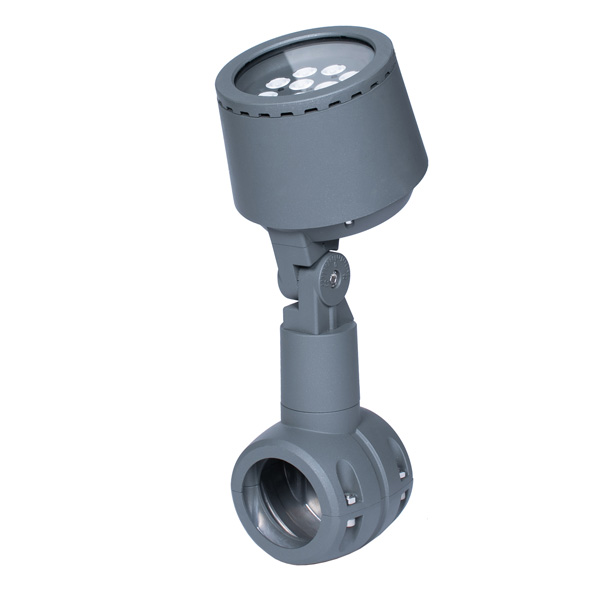
![48W Pole-Mounted LED Spotlight | Project Configuration]() 48W Pole-Mounted LED Spotlight | Project Configuration48W pole-mounted LED spotlight reference for parking areas, walkways, facades, s···read more
48W Pole-Mounted LED Spotlight | Project Configuration48W pole-mounted LED spotlight reference for parking areas, walkways, facades, s···read more -
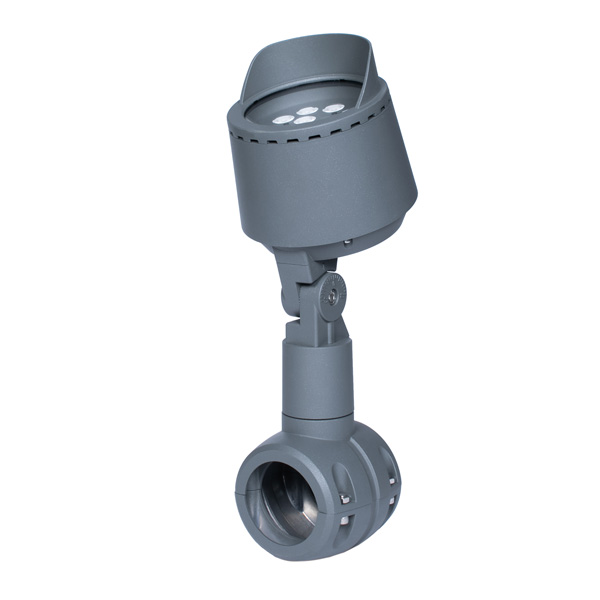
![36W Pole-Mounted LED Spotlight | Project Configuration]() 36W Pole-Mounted LED Spotlight | Project Configuration36W pole-mounted LED spotlight reference for walkways, parking areas, trees, fac···read more
36W Pole-Mounted LED Spotlight | Project Configuration36W pole-mounted LED spotlight reference for walkways, parking areas, trees, fac···read more -
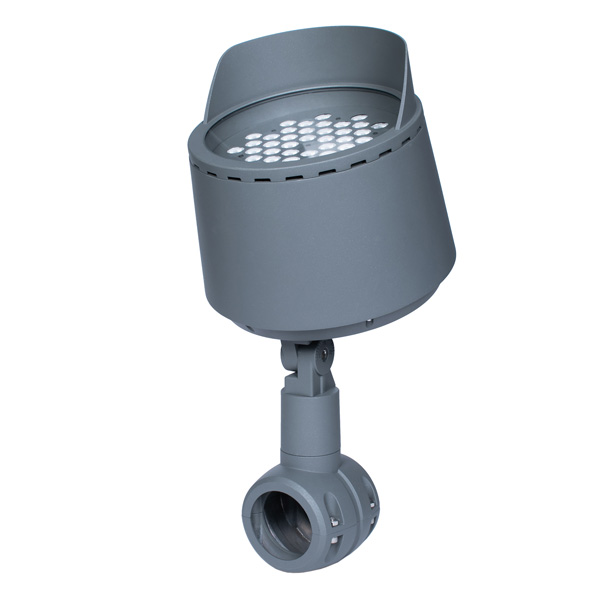
![120W Pole-Mounted LED Spotlight | Outdoor Projection Reference]() 120W Pole-Mounted LED Spotlight | Outdoor Projection Reference120W pole-mounted LED spotlight reference for outdoor projection, with final bea···read more
120W Pole-Mounted LED Spotlight | Outdoor Projection Reference120W pole-mounted LED spotlight reference for outdoor projection, with final bea···read more